Articles with the tag:
Close
Changelog
Close
Try in the cloud
Try in the cloud
Help Center
Integration

About the ONLYOFFICE and Confluence integration

ONLYOFFICE offers an official connector to integrate ONLYOFFICE Docs with Confluence and edit office documents within the document library. You can install the ONLYOFFICE connector from the Atlassian Marketplace or download it from the GitHub page. The application is distributed under the Apache license.

To learn more about how it works and how to compile the ONLYOFFICE connector for Confluence, please visit our API documentation.

Main features

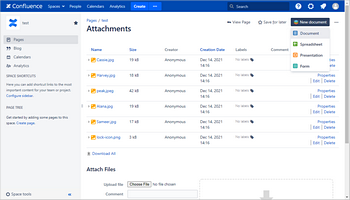
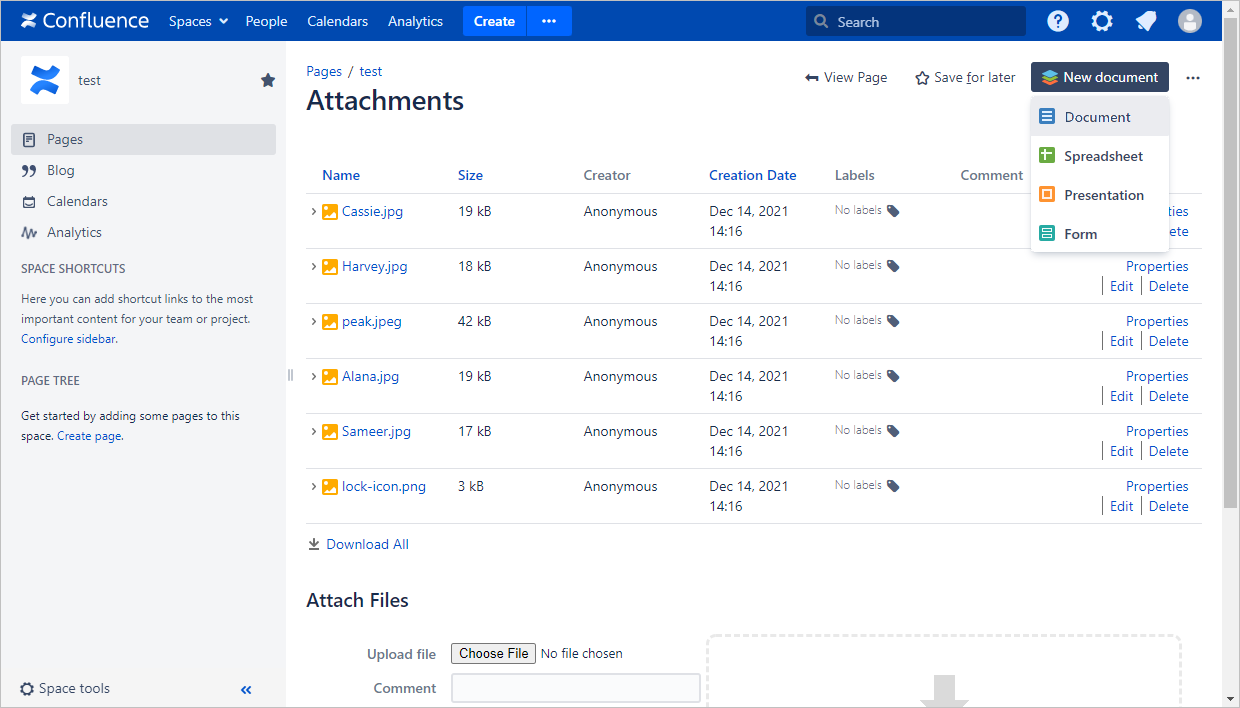
  • Creating text documents, spreadsheets, and presentations using the New document option.
  • Creating and filling out online forms.
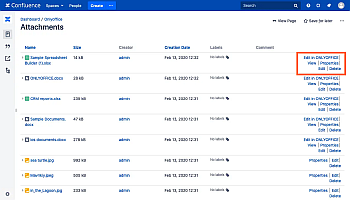
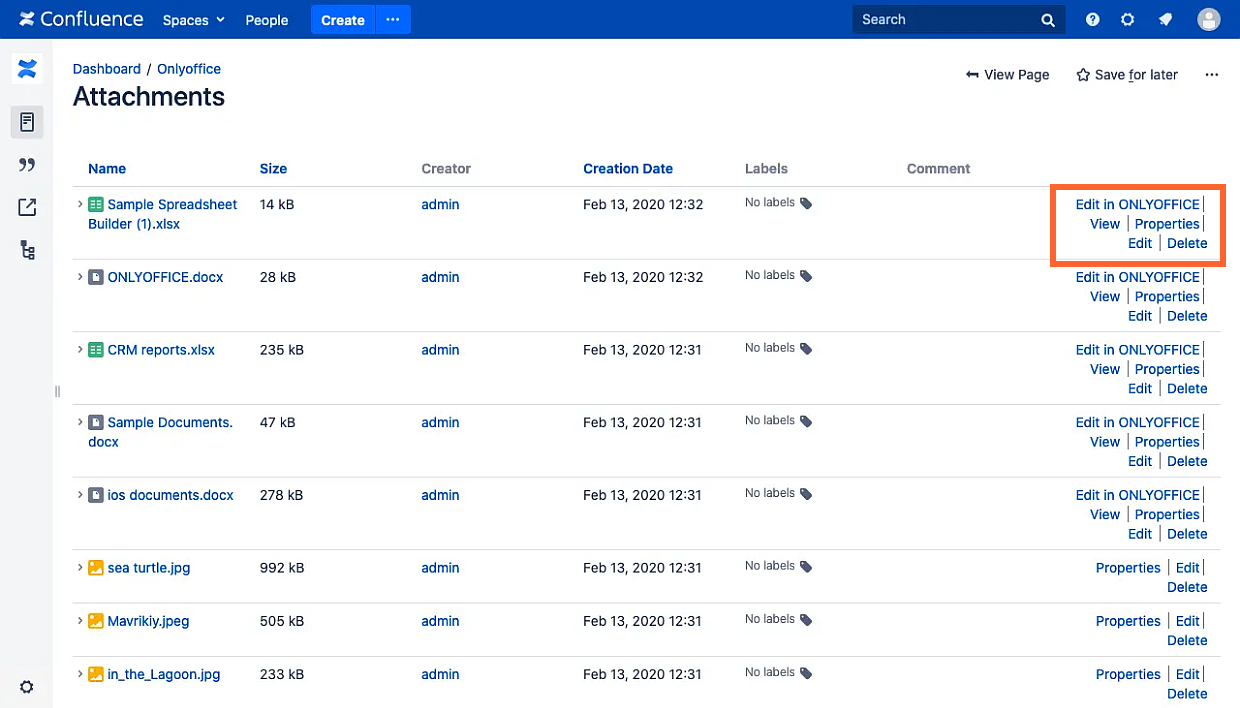
  • Editing and viewing documents with the Edit in ONLYOFFICE option.

    Confluence Cloud supports uploading and editing files.

  • Co-editing documents in real-time: two co-editing modes (Fast and Strict), Track Changes, comments, and a built-in chat.
  • JWT support to secure your traffic so that no one, besides the users with proper rights, can have access to your documents.

Supported formats

  • For creating: DOCX, XLSX, PPTX, DOCXF
  • For editing and viewing: DOCM, DOCX, DOCXF, DOTM, DOTX, HTM, POTM, POTX, PPSM, PPSX, PPTM, PPTX, XLSM, XLSX, XLTM, XLTX, XML
  • For editing with possible loss of information: CSV, EPUB, FB2, HTML, ODP, ODS, ODT, OTP, OTS, OTT, RTF, TXT
  • For filling forms: OFORM

    Confluence Cloud does not support .oform and .docxf formats.

  • For conversion to Office Open XML: DOC, DOCM, DOCXF, DOT, DOTM, DOTX, EPUB, FB2, FODP, FODS, FODT, HTM, HTML, MHT, ODP, ODS, ODT, OTP, OTS, OTT, OXPS, PDF, POT, POTM, POTX, PPS, PPSM, PPSX, PPT, PPTM, RTF, XLS, XLSM, XLT, XLTM, XLTX, XML, XPS

    Confluence Cloud does not support conversion. All these formats are supported for viewing only.

  • For viewing only: CSV, DJVU, DOC, DOCM, DOCX, DOCXF, DOT, DOTM, DOTX, EPUB, FB2, FODP, FODS, FODT, HTM, HTML, MHT, ODP, ODS, ODT, OFORM, OTP, OTS, OTT, OXPS, PDF, POT, POTM, POTX, PPS, PPSM, PPSX, PPT, PPTM, PPTX, RTF, TXT, XLS, XLSM, XLSX, XLT, XLTM, XLTX, XML, XPS

What's new in version 4.3.1

Added

  • Compatibility with Confluence 8.4.0
  • Document Server v6.4 and earlier is no longer supported
  • Document preview
  • Downloading files from storage
  • Paste Special in the Spreadsheet Editor. Please read the Use the Paste Special feature section in the following article to learn more about this feature
  • New supported formats
  • Internal improvements for the JWT signature
  • Vulnerability dependency update

The full change log is available here.

Connecting ONLYOFFICE Docs to Confluence

Requirements

  • ONLYOFFICE Docs (Document Server) 7.0 or later

    Document Server v6.4 and earlier is no longer supported.

    You need an instance of ONLYOFFICE Docs that is resolvable and connectable both from Confluence and any end clients. It must be able to POST to Confluence directly.

    Please refer to the official documentation page to learn more about installing ONLYOFFICE Docs.

    You can also use ONLYOFFICE Docs Cloud (SaaS version).

  • Confluence Data Center 7.12.0 - 8.4.0 or Confluence Server 7.12.0 - 8.4.0

Installing the ONLYOFFICE connector for Confluence from the Atlassian Marketplace

You can download the latest connector version from the official Atlassian Marketplace. To do so, please follow these steps:

  1. Log into your Confluence instance as an administrator.
  2. Click the admin drop-down box and choose Manage apps. The Manage apps screen will appear.
  3. Click Find new apps on the left-hand side of the page.
  4. Locate ONLYOFFICE Connector for Confluence via search. Results will include the add-on versions compatible with your Confluence instance.
  5. Click Install to download and install your application.
ONLYOFFICE_connector ONLYOFFICE_connector

Configuring the ONLYOFFICE connector for Confluence

Go to Confluence administration -> Manage apps> -> ONLYOFFICE Connector for Confluence -> Configure:

  • Document Server - specify the URL address where ONLYOFFICE Docs is installed (e.g. https://documentserver).
    ImportantThe address of ONLYOFFICE Docs must be accessible from Confluence, as well as the address of Confluence must be accessible from ONLYOFFICE Docs.
  • Secret key - specify the JWT secret used to sign the data.
    Starting from ONLYOFFICE Docs v7.2, JWT is enabled by default and the secret key is generated automatically. You need to enable it on the Confluence side as well: find your secret key in the ONLYOFFICE Docs configuration file, then specify the same secret key in the connector settings. For more details, see the Enabling JWT for the ONLYOFFICE and Confluence integration section of this article.

Advanced server settings:

  • Server address for internal requests from the Document Editing Service - address that is used to access the Confluence server from the Document Editing Service.
  • Document Editing Service address for internal requests from the server - address that is used to access the Document Editing Service from the Confluence server.

Confluence Cloud does not support configuration of advanced settings.

ONLYOFFICE_configure ONLYOFFICE_configure

Enabling JWT for the ONLYOFFICE and Confluence integration

To protect documents from unauthorized access, ONLYOFFICE editors use the JSON Web Token (JWT). The token is added in the configuration when the Document Editor is initialized and during the exchange of commands between inner ONLYOFFICE Docs services. The secret key is used to sign the JSON web token and validate the token upon the request to ONLYOFFICE Docs.

Starting from ONLYOFFICE Docs v7.2, JWT is enabled by default and the secret key is generated automatically. You need to find your secret key in the ONLYOFFICE Docs configuration file, then specify the same secret key in the connector settings.

Step 1: Find your secret key in the ONLYOFFICE Docs configuration file

  1. Open the local.json file with any available text editor.
    • For Linux - /etc/onlyoffice/documentserver/local.json
    • For Windows - %ProgramFiles%\ONLYOFFICE\DocumentServer\config\local.json
    • For Docker – enter the ONLYOFFICE Docs container using the docker exec -it <containerID> bash command and open /etc/onlyoffice/documentserver/local.json

      Alternatively, you can use the following command to find the default secret key without opening local.json:

      sudo docker exec <containerID> /var/www/onlyoffice/documentserver/npm/json -f /etc/onlyoffice/documentserver/local.json 'services.CoAuthoring.secret.session.string'

    The local.json file should look like this:

    {
      "services": {
        "CoAuthoring": {
          "token": {
            "enable": {
              "request": {
                "inbox": true,
                "outbox": true
              },
              "browser": true
            }
          },
          "secret": {
            "inbox": {
              "string": "yoursecret"
            },
            "outbox": {
              "string": "yoursecret"
            },
            "session": {
              "string": "yoursecret"
            }
          }
        }
      }
    }
    
  2. The true value is specified in three sections. It means that token validation is enabled.
    • services.CoAuthoring.token.enable.browser
    • services.CoAuthoring.token.enable.request.inbox
    • services.CoAuthoring.token.enable.request.outbox
  3. The automatically generated secret key is specified in three sections. You can replace the default secret value with your own secret key. The secret key must be the same in three sections.
    • services.CoAuthoring.secret.inbox.string
    • services.CoAuthoring.secret.outbox.string
    • services.CoAuthoring.secret.session.string
  4. If you make changes, save them and restart the services for the config changes to take effect.
    supervisorctl restart all

Step 2: Specify the same secret key in the connector settings

In the connector settings, specify the same secret in the Secret key field and save the settings.

Connecting to the demo ONLYOFFICE Docs

Confluence Cloud does not support connecting to the demo server.

If you would like to test the ONLYOFFICE online editors within Confluence without installing ONLYOFFICE Docs, go to Confluence administration -> Manage apps -> ONLYOFFICE Connector for Confluence -> Configure, tick the Connect to demo ONLYOFFICE Document Server checkbox and click the Save button.

This is a public test server that will be available during a 30-day period. Don’t share your sensitive data there.

Start using ONLYOFFICE Docs within Confluence

To create a file:

  1. Open the page where you need to create a file.
  2. Click the New document button.
  3. Choose the needed file type.
  4. Enter the file name in the text field near the file type icon.
  5. Click the Confluence save object icon Save button.

The document will be opened in the ONLYOFFICE Docs editor.
ONLYOFFICE_newfile ONLYOFFICE_newfile

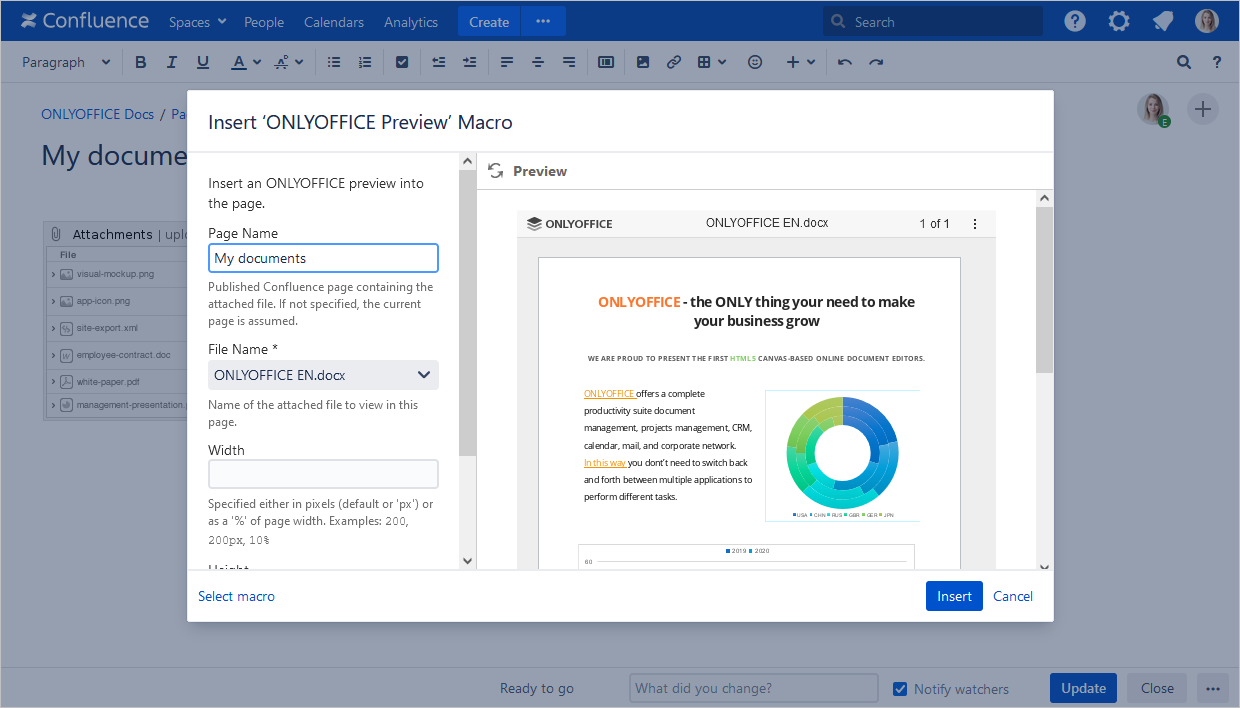
To create a file preview:

  1. Open any Confluence page for editing.
  2. Click the Insert more content option.
  3. Choose the Other macros option.
  4. Select the ONLYOFFICE Preview option.
  5. Choose the required file on the Attachments page.
  6. Adjust the file preview width and height if necessary.
  7. Click the Insert button.
ONLYOFFICE_previewfile ONLYOFFICE_previewfile

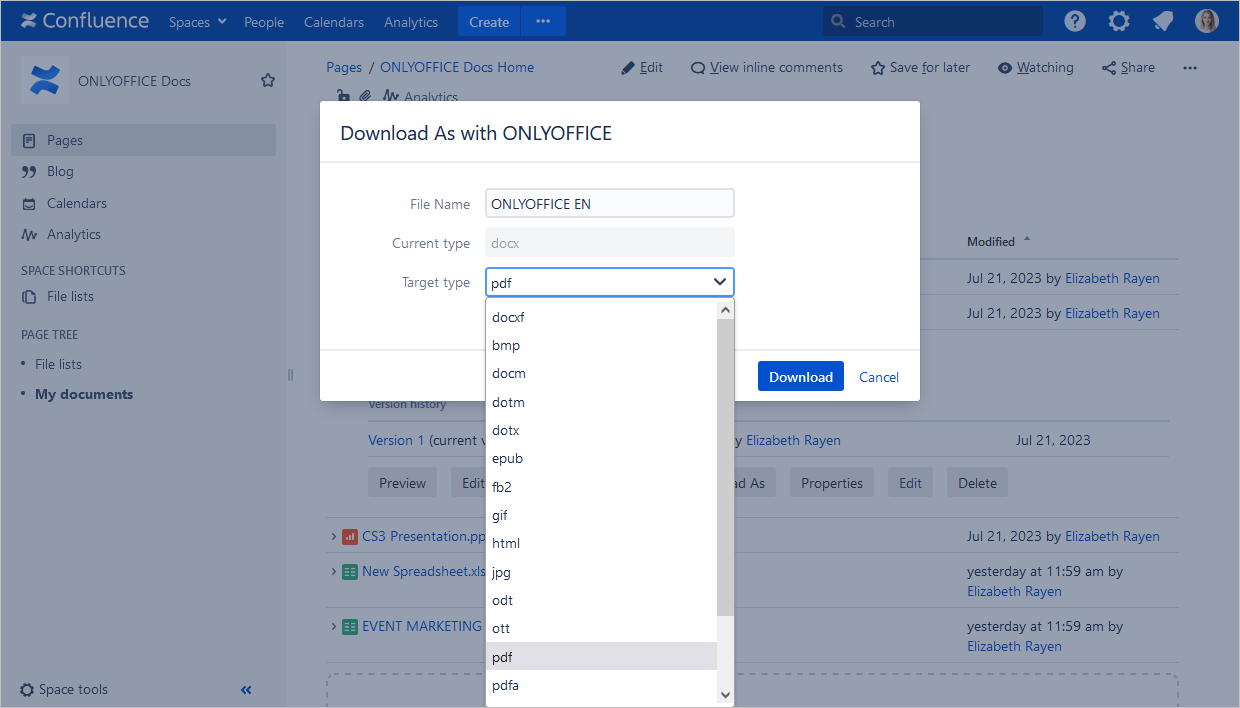
To download a file:

  1. Open the file context menu by clicking the arrow to the left of its name.
  2. Click the Download as button. The Download as with ONLYOFFICE window will open.
  3. Edit the File Name in the corresponding field if necessary.
  4. Open the Target type drop-down menu and choose the required format.
  5. Click the Download button.
ONLYOFFICE_downloadfile ONLYOFFICE_downloadfile

To edit or view a document:

  1. Find the needed file.
  2. Click the Edit in ONLYOFFICE button.

The document will be opened in the ONLYOFFICE editor.

To co-edit a document, the authorized users should open the same file together.

ONLYOFFICE_editfile ONLYOFFICE_editfile

To create a form:

  1. Open the page where you need to create a file.
  2. Click the New document button and choose the Form option.
    ONLYOFFICE_newform ONLYOFFICE_newform
  3. Enter the file name in the text field near the file type icon.
  4. Select the .docx file attached to this or other pages or choose the Create from blank option.
  5. The form will be opened in the ONLYOFFICE Docs editor.
  6. Save the form as .docxf to have future access to editing, revising or collaborating.

To create a fillable form and restrict file editing by other users:

  1. Go to the Attachments.
  2. Click the Create form using ONLYOFFICE link to the right of the .docxf file. The .oform file will be created in the Attachments section.
    ONLYOFFICE_createform ONLYOFFICE_createform

To fill out a form:

  1. Go to the Attachments.
  2. Click the Fill form in ONLYOFFICE link to the right of the .oform file.
    ONLYOFFICE_fillform ONLYOFFICE_fillform
  3. The form will be opened in the ONLYOFFICE Docs editor.
To learn more about forms, please read the corresponding articles for creating and filling out forms.
Download Best editors on your website Let your site users view, edit and collaborate
on all types of text, spreadsheet and presentation files
You Might Also Like This:
Close