To create a new document, spreadsheet, presentation, or PDF form, click the corresponding menu item in the Create new section on the left.
On Windows 7 and later, you can also use shortcuts in the Start menu or in the taskbar and choose the necessary option from the task list.
A new file will open in a new tab or in a new window subject to the option you choose. To select the needed option, go to the Settings section in the left side menu, scroll down to the Open file, click the arrow to open the drop-down menu, and select In its own tab or In its own window. Click the Apply button at the bottom of the page for changes to take effect.
To quiсkly create a new form, use the Templates tab. You can choose the necessary Language and Category, use the Search and Sort tools.
When you click on a form, you will see its preview and a brief description. Click the Open button to start editing the form.
the tab-based interface allows working with multiple files within one and the same window. It’s also possible to drag and drop a document into a separate window (on Windows and Linux only).
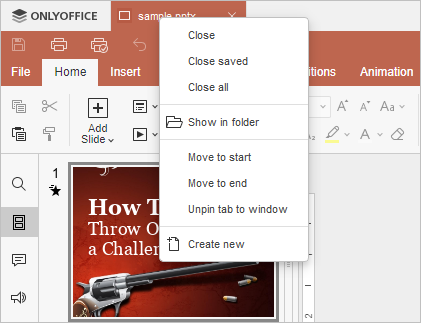
To manage tabs, you can also use the tab context menu. Right-click the tab to open the menu, and choose one of the available options
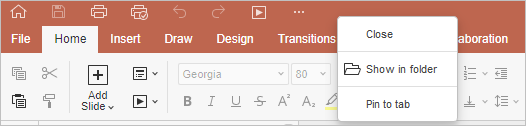
Context menu is also available with the unpinned windows. Right-click the editor header to access the menu, and choose one of the available options:
To save the created document, click the Save  icon at the top toolbar. In a new window that opens, select the location on your computer where you want to store the file, specify the file name, choose the necessary format, and click the Save button.
To quickly access recently opened documents, use the Recent files section of the left-side menu in the main program window. Click a file to open it.
If you right-click a file, you can use one of the available contextual menu options:
- Open – to open the file in a new tab.
- Show in folder - to show the location of the file.
- Remove from list – to remove the file from the Recent files list (the files will not be deleted from your hard disk drive, they will just disappear from the list of recent files).
- Clear – to remove all the files from the Recent files list.
The Open local file section in the left side menu of the main program window allows accessing all documents stored on your computer. Click the Browse button. A new window will open where you can select the file you need.
All the directories that you have accessed using ONLYOFFICE Desktop Editors will be displayed in the Recent folders list so that you can quickly access them afterward. Click the necessary folder to select one of the files stored in it.
You can edit documents, spreadsheets, and presentations, fill in PDF forms using a great number of formatting and styling tools. To learn more, you can refer to the corresponding sections of the documentation for Document Editor, Spreadsheet Editor, Presentation Editor, PDF Editor.
Detailed instructions on using features can also be found here: Editors User Guides.