Articles with the tag:
Close
Changelog
Close
Try in the cloud
Try in the cloud
  • All
  • Overview
  • Editing profile
  • Adding new portal members
  • Managing access rights
  • Reassigning data when deleting profiles
  • Keeping track of birthdays
  • Enabling CardDAV synchronization
  • Changing People module settings

Overview

People is a module where all portal members as well as group participants are displayed.

There can be two types of members on your portal:

  • Users - they are portal members who take an active part in portal life and can create their own content.
  • Guests - they are external users with view-only permissions.

Every member has one of the following statuses:

  • Active - such portal members are visible in the main list, have already confirmed their registration email address, receive email notifications and can collaborate with other portal members.
  • Pending - such people were added to the portal or changed their registration email address on their profile page, but haven't confirmed it yet. They can log in to the portal and collaborate with other members, but won't receive any email notifications.
    If you are using the cloud version, users with the Pending status are included into the overall active users number on your portal Pricing page.
  • Disabled - such portal members were transferred to the list of disabled members that can be viewed by selecting the appropriate filter option. They can't log in to the portal any more.
The full access administrators can change the portal members' type and status by selecting them in the list and clicking the 'Change Type' or 'Change Status' button at the top or on their profile page. Please bear in mind that it's impossible to change type for the administrators.

Editing profile

Every active portal member can edit his own profile. To do that,

  1. click the link with your name in the right upper corner
  2. select the Profile option
  3. press the Edit Photo button at the bottom of the current profile photo to upload another one and select the image area that will be displayed as your avatar photo
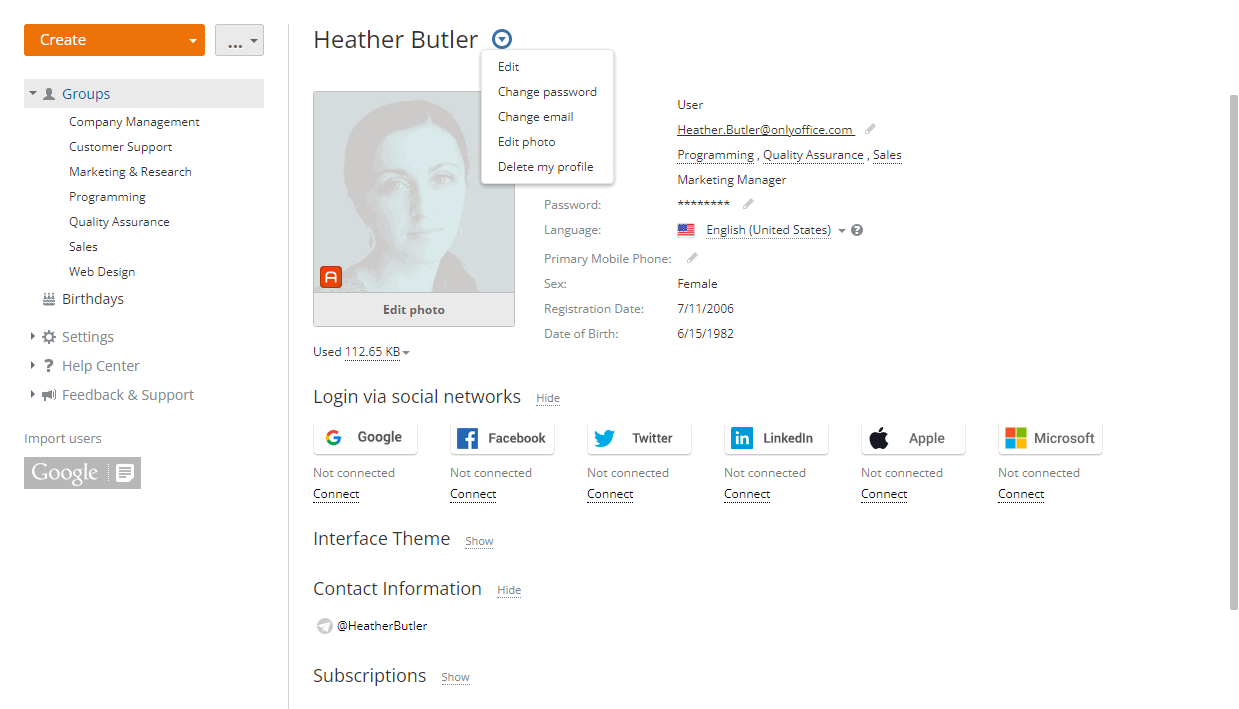
  4. click the Actions Icon icon above your photo and select one of the following options depending on your goal:
    • Edit - to change personal information displayed on your profile page: first or last name, registration date, title, location, sex, date of birth, contact details, avatar photo
    • Change password - to change your password you use to log in to the portal (you can do that also by clicking the Edit Icon icon next to the current password on your profile page)
      By default, the password must be at least 8 but no more than 120 characters long.
    • Change email - to change your registration email address (you can do that also by clicking the Edit Icon icon next to the current email on your profile page)
    • Edit Photo - to upload another photo and select the image area that will be displayed as your avatar photo
    • Delete my profile - to receive instructions per email on how to do that
Editing Profile Editing Profile

In case two-factor authentication is enabled in the portal settings, you can also change your Primary Mobile Phone. After you click the Change phone number Icon icon, the information window will open. Press OK. You'll be redirected to another page, where you will be able to specify a different phone number and press the Enter number button to save it. You'll receive an SMS with a verification code to your new mobile phone.

The full access administrators can edit not only their own profiles but also other portal members' profiles. For this purpose,
  1. find the needed person in the portal members list and open his/her profile page.
  2. click the Actions Icon icon next to the member's name and select one of the available options (they coincide with the options listed above, the only difference is the Disable option that is used to move the portal member to the list of disabled members who can't log in to the portal any more).
  3. it's also possible to set or change the memory quota in the user profile. The disk space used by the user is displayed below the profile photo. Click the arrow and select the Edit quota option. Set the necessary value in the input field and choose the unit of measure from the dropdown list (bytes, Kb, Mb, Gb, Tb). Click the checkmark button to save the settings. To disable the quota use the No quota option.

Being a portal member, you can also change the portal language within your account. For this purpose, open your profile page and select one of the available options in the Language dropdown list. By default, the portal is displayed in the language chosen in the common portal settings by a full access administrator.

You can find the list of languages already available and that will be available at your portal in the nearest future in this article. If you'd like to contribute to the online office translation, please read this article to learn how to do that.
Changing Language Changing Language

To facilitate your login to the portal, you can use one of your social accounts at Google, Facebook, Twitter, or LinkedIn. To connect it, please

  1. open your profile page clicking the link with your name in the right upper corner and selecting the Profile option
  2. click the Connect link under the needed social network icon
  3. enter your email address and password into the corresponding fields within the opened window
  4. allow the online office to access your account data pressing the appropriate button

The Interface Theme section allows you to choose the preferred interface theme: light, dark, or system theme (to automatically switch between light and dark themes according to your system settings).

It's also possible to manage your subscriptions within all portal modules on your profile page. To view the whole list of the portal content you are subscribed to, click the Show link next to the Subscriptions caption. Here you can unsubscribe from the content that isn't interesting to you any more and change the way you want to be informed about updates selecting one of the available notification types: via Talk, email or both. For further information, please refer to this article.

You can also disable or enable back tooltips that appear on the screen to introduce you to the basic features of each module when you log in for the first time or to inform you of new features added. Click the Show link next to the Tooltips caption and click the on-off control. The tooltips will be enabled or disabled for all modules at once.

Managing Subscriptions Managing Subscriptions

Adding new portal members

As a portal owner or full access administrator, you can add new members to the portal.

If you've created your portal recently and have not yet added users, the Invite users to portal icon Invite users to portal button is available on the left side panel in each portal module. It allows you to quickly and easily invite new members to your portal so that they could join it:

  1. click the Invite users to portal icon Invite users to portal button

    The invitation link will be copied to the clipboard right away and the Invitation Link window will open allowing you to adjust additional link settings:

    • check the Add users as guests box to invite people who will have view-only permissions on your portal (if you want these people to create portal content, leave this box unchecked). After you change this parameter do not forget to copy the renewed link using the Copy link option.
    • you can also Get the shortened link which is more suitable for adding to your message
  2. paste the copied link into your invitation message and send it or share the link via social networks using the corresponding icons in the Invitation Link window

The link is valid for 7 days only.

Later you can click the Additional Options button button in the left upper corner within the People module and select the Invitation Link option to copy the invitation link and open the corresponding window.
Sending Invitation Link Sending Invitation Link
Add users manually

You can also add portal members manually one by one:

  1. click the Create button in the left upper corner within the People module
  2. select the User or Guest option from the dropdown list
  3. fill in the fields marked with asterisk - first and last name as well as email address.

    When creating a user you can specify an existing email address or create a new email on the domain previously connected in the Mail module. For a guest you can specify an existing email address only. To create a new mailbox for a user, click the Create email on domain link. Enter a user name for the new mailbox in the entry field. If you have several domains connected in the Mail module select the necessary domain from the drop-down list.

    When creating a user/guest it's also possible to create a temporary password so that the user/guest can access the portal for the first time (he/she can change this password later at his/her profile page). To create a password click the Set password link. Once you click this link, the field becomes obligatory. You can enter a password manually or generate it automatically. The password is validated as you type, its compliance with the password strength requirements is indicated by color. To generate a new password automatically click the Generate password icon. The requirements for the password generation and validation are determined by the Password Strength Settings specified in the portal Security settings.

    By default, the password must be at least 8 but no more than 120 characters long.

    The specified email and password can be copied to the clipboard by clicking the Copy email and password link.

    You can also select a group (or even several groups) the user/guest will belong to, enter his/her title and location, upload an avatar photo, etc. The registration date is set to the current date by default, but you can change it clicking within the field.
  4. click the Save button
Adding Users Adding Users

Right after that the newly added member's profile page opens and an email notification with a link for accessing the portal is sent to him/her. The new portal member gets the pending status till he/she confirms his/her registration email address. In the portal members list he/she will be marked with the Pending Icon icon at his/her avatar photo. After the email confirmation the guests get the Guest Icon icon on their avatar photo and administrators - the Administrator Icon icon. The portal owner is marked with the Owner Icon icon.

The link sent in the notification is valid for 7 days only. If the user doesn't manage to complete the registration by following the link in time, you can resend this notification clicking the Send invitation once again link on his/her profile page. If there are several users who exceeded the time limit given for email confirmation, click the Additional Options button button in the left upper corner and select the Send invitations once again option or select the needed members in the list and click the Send activation link once again button at the top.

Import people

To save time, you can also add users all at once from:

  • your Google account - for further instructions read this article
  • your mail client address book - for further instructions read this article
  • a CSV file - for further instructions read this article
You can also add guests all at once. For further instructions please refer to this article.
Create groups

While adding members, you will certainly need to create new groups. To do that,

  1. click the Create button in the left upper corner within the People module
  2. select the Group option from the dropdown list
  3. enter the group Title into the field marked with asterisk
  4. assign the group Head by clicking the Choose user link and selecting one of the existing users/guests or creating a new profile
  5. add group Members by clicking the Add members link and selecting the existing users/guests or creating new profiles one by one
  6. click the Save button
Adding Groups Adding Groups

Managing access rights

There are three main access levels within portal: Guest with view-only permissions, user with basic privileges and administrator with advanced privileges.

Among administrators there are:

  • module administrators managing one particular module or several of them
  • full access administrators managing all portal moduls
  • portal owner having control over the whole portal
Changing portal owner

Actually, the portal owner is the person who created the portal. If he wants to appoint another portal member to this position, he needs to:

  1. switch to the portal settings choosing the Settings option in the top menu,
  2. expand the Security section on the left-side panel and select the Access Rights subsection,
  3. click the Choose Owner link under his photo in the Portal Owner section,
  4. select a person from the dropdown list,
  5. click the Change Portal Owner button,
  6. check the mail box and follow the confirmation link sent in the email message.
Changing Portal Owner Changing Portal Owner

The portal owner has the same permissions as full access administrators and can perform the following operations:

Full Access Administrator Portal Owner
add portal members
edit member profiles
appoint module administrators
backup portal data (see Tips & Tricks)
change general and customization portal settings
(see Portal Configuration)
view portal statistics (see Portal Configuration)
+
change portal owner
deactivate/delete portal (see Portal Configuration)
change server region (see Portal Configuration)
Granting administrator privileges

After a portal member is added to the portal, he gets user or guest access rights. The portal owner or full access administrators can grant administrator privileges to users only. To do that, they need to proceed through the following steps:

  1. switch to the portal settings choosing the Settings option in the top menu,
  2. select the Access Rights option on the left-side panel,
  3. click the Show link next to the Administrators caption,
  4. click the Choose user link under the list of administrators,
  5. select a person or several persons at once from the existing users/guests or create a new administrator right here by clicking the Create new profile link,
  6. click the Save button,
  7. the selected person(s) will get the maximum access to all portal modules by default; to limit it, uncheck the Full Access box first and then the boxes corresponding to the modules you don't want to grant administrator access to.
Adding Administrators Adding Administrators
Permissions for Documents, CRM, Community, People, and Mail modules

This access rights structure - guest/user/administrator - is valid for the following portal modules:

  • Documents
  • CRM
  • Community
  • People
  • Mail
The guests have no access to the 'CRM' 'People' and 'Mail' modules at all. They only can view and edit their own profile.

The main permissions are listed in the table below.

Documents CRM Community People Mail
Guest view files available to all portal members, download files from the 'Common Documents' folder and documents shared with them add comments to existing posts, attach files to comments edit own profile
User create/edit/manage/share files and folders in the 'My Documents' section, view files in 'Common Documents' add new content and edit own one create new module content and edit own one edit own profile, view other members' profiles manage own mail accounts, receive and send letters
Module Administrator +
create/edit/manage/share files and folders stored in the 'Common Documents' section
+
configure module settings, import/export data, send email messages to CRM contacts in bulk, view/edit the whole module content
+
moderate the whole module content
+
add/invite users, create groups and edit other members' profiles
+
manage Mail Server (add own domain, create mailboxes, mail groups) and general Mail settings
Permissions for Projects module

The access rights structure in the Projects module is more complicated and comprises five levels:

  • guest - an external user with view-only permissions
  • user - a portal member not participating in any (or in the particular) project
  • project team member
  • project manager
  • module administrator

The main permissions are listed in the table below.

Guest/ User Team Member Project Manager Module Administrator
view projects available to all portal members or private ones (where he is a project team member), leave comments and subscribe to tasks and discussions belonging to projects he can access +
create/assign/manage own tasks, create discussions, add/delete own files
+
manage project team, create/edit the whole project content, change project status, set access rights for team members (for private projects only)
+
create/edit/delete any project, appoint project managers, create/edit project templates

Portal tools - Mail, Talk, Calendar, Feed - are available to all portal users. The guests can use every tool with the exception of Mail.

Reassigning data when deleting profiles

What happens to the data without reassigning

If you do not reassign data when deleting disabled users, the related contents created by a user on the portal will also be deleted as follows:

  • In the Documents module, personal documents/folders will be deleted, common documents created by the user will be reassigned:
    • Personal documents and folders that are not accessible to other users (including administrators) will be deleted.
    • Personal documents and folders that have been shared with other users will be deleted.
    • Documents/folders created by the user in the Common section are not deleted, but their ownership is reassigned to the administrator who initiates the user deletion.
  • In the Mail module, emails and mailboxes will be deleted.
  • In the Talk tool, messages and files sent by the user will be deleted.
  • In the CRM module, the deleted user will also be deleted from the list of managers responsible for a contact. The reports created by the deleted user will be deleted (on the analogy of the personal documents). Other CRM entities related to the deleted user are not affected.
  • In the Projects module, all the entities related to the deleted user are not affected (e.g., the name of the deleted user remains among other users responsible for an open task).

To avoid the data deletion, you can reassign Documents, Projects and CRM entities to an active user.

currently, the data reassignment option is only available for the users with the Disabled status, it's not possible to reassign the data that belongs to an active user.
What happens to the data after reassigning

After you reassign data and delete a user, the following contents will be transferred/kept:

  • Documents module
    • Personal documents that are available to other portal users will be transferred to the My documents section of the selected active user where a new folder will be created with the name like 'Documents of user Merelin Linsdom'. All the access rights provided to other portal users remain unchanged;
    • The ownership for the documents created by the disabled user in the Common section will be reassigned to the selected user;
    • Documents from the In projects section created by the disabled user remain, the owner will not be changed.
  • Projects module
    • Active/paused projects, open milestones and tasks will be reassigned to the selected active user.
  • CRM module
    • Contacts, open tasks and unclosed opportunities will be reassigned to the selected active user. The specified user will also be added as a participant to open cases of the disabled user.

After you reassign data and delete a user, the following contents will be deleted:

  • Private documents that have not been shared with other users in the Documents module;
  • Emails and mailboxes in the Mail module;
  • Message history and sent files in the Talk tool;
  • Closed projects, milestones, tasks in the Projects module;
  • Closed tasks and opportunities in the CRM module.
Deleting a single user

To delete a single user,

  1. Open the list of disabled users selecting the corresponding status in the filter on the top,
  2. Click the Actions Icon Actions button next to the disabled user,
  3. Select the Delete profile option from the menu,
  4. A confirmation window opens where you'll be prompted to reassign the user's data:
    Deleting a profile Deleting a profile
  5. Click the Reassign data button in the confirmation window.
  6. A new page opens where you can select a portal user you wish to reassign data to. Choose the necessary active user from the list.
  7. The Delete profile when reassignment is finished box is checked by default that allows to automatically delete the profile after data reassignment.
  8. Click the Reassign button.
    Reassigning data Reassigning data

    Now you can close this page. Once the reassignment process is over, you'll be notified via email. If you unchecked the Delete profile when reassignment is finished box, you can return to the list of disabled users and manually delete the user without losing his/her data.

Deleting several users

Data reassignment is an individual action, i.e. if you want to delete several users at once, you'll need to previously reassign the data for each of them separately.

To reassign the data of any disabled user,

  1. Click the Actions Icon Actions button next to the disabled user.
  2. Select the Reassign data option from the menu.
  3. A new page opens where you can select a portal user you wish to reassign data to. Choose the necessary active user from the list.
  4. Check the Delete profile when reassignment is finished box to automatically delete the profile after data reassignment.
  5. Click the Reassign button.

Once you reassign all the necessary data, (if you did not check the Delete profile when reassignment is finished box) you can return to the list of disabled users, check the users you want to delete and press the Delete button above the user list to remove several users at once without losing their data.

Keeping track of birthdays

Birthdays is a way to keep track of all portal users' birthdays. It allows you to:

  • view the users who have their birthdays this day and ten nearest dates,
  • send your greetings to a person the day of his/her birth clicking the corresponding button below his/her name in the Nearest dates list,
  • set/remove a reminder,

    By default, you are subscribed to all the birthdays. If you don't want to receive the notification each time somebody has his/her birthday, unsubscribe from them managing your subscriptions on the Profile page.

    If you wish to be notified about the upcoming birthday of a certain portal user, hover the mouse pointer over the necessary user name in the Nearest dates list and click the Remind about the birthday link which appears below the user name.

Tracking Birthdays Tracking Birthdays

Enabling CardDAV synchronization

Starting from v. 12.0, ONLYOFFICE supports the CardDAV address books protocol based on the contacts in the People module. Changes made to the user data on your portal are synchronized with the corresponding books. Currently, the syncronization is one-sided.

To enable CardDAV synchronization,

  1. Go to the People module and open the CardDav Settings in the Settings menu in the left panel.
  2. Turn the Enable synchronizing contacts via CardDAV switcher on.
  3. Click the Copy link option below the switcher.
  4. Enter the copied server address link in a third-party application or device. Use your valid portal login and password.

Now your contacts saved in the People module can be accessed by the third-party application or device of your choosing.

The third-party application or device must support the CardDAV protocol as well.
Thunderbird v.91.8.0
  1. Click the Address Book option on the top toolbar.
  2. Click File -> New -> CardDAV Address Book.
  3. Enter your portal username and the copied server address link and click Continue.
  4. Enter your portal login and password.
  5. The address book will be added to the list.

Changing People module settings

Being a portal owner or full access administrator you can restrict access to the People module for some users or even disable this module, if you don't need it at all. To do that,

  1. click the Settings link on the left-side panel,
  2. select the Portal Access Rights subsection,
  3. go to the People section,
  4. check the Users from list radio button,
  5. select the users you wish to grant access to,

    To do that, use one of the available options;

    • use the Add user link if you wish to grant access to one or more people;
    • use the Add group link if you wish to grant access to all portal users, or to one or more groups.
Disabling People module

To disable the People module just switch to the Modules & Tools section selecting the corresponding option on the left-side panel, uncheck the People module and click the Save button.

If the People module is disabled, each portal member can access his/her own profile only.
Change People Module Settings Change People Module Settings
Download Host on your own server Available for
Docker, Windows and Linux
You Might Also Like This:
Close