Insert text objects
-
inserire oggetti
-
text art
-
formattazione casella di testo
-
formattare caratteri
-
Posta
-
Impostare il tipo, la dimensione e il colore del carattere
-
Impostare tipo di carattere, dimensione, stile e colore
-
Impostare il tipo, la dimensione e il colore del carattere
-
Applicare stili di decorazione dei caratteri
-
Aggiungere collegamenti ipertestuali
-
Impostare il tipo, la dimensione e il colore del carattere
-
Aggiungere collegamenti ipertestuali
-
Impostare il tipo, la dimensione e il colore del carattere
-
Applicare stili di decorazione dei caratteri
-
Aggiungere collegamenti ipertestuali
-
Impostare il tipo, la dimensione e il colore del carattere
-
Applicare stili di decorazione dei caratteri
-
Aggiungere collegamenti ipertestuali
-
Impostare il tipo, la dimensione e il colore del carattere
-
Aggiungere collegamenti ipertestuali
-
Impostare il tipo, la dimensione e il colore del carattere
-
Applicare stili di decorazione dei caratteri
-
Aggiungere collegamenti ipertestuali
-
Impostare il tipo, la dimensione e il colore del carattere
-
Applicare stili di decorazione dei caratteri
-
Aggiungere collegamenti ipertestuali
-
Impostare il tipo, la dimensione e il colore del carattere
-
Aggiungere collegamenti ipertestuali
-
Impostare il tipo, la dimensione e il colore del carattere
-
Applicare stili di decorazione dei caratteri
-
Impostare il tipo, la dimensione e il colore del carattere
-
Applicare stili di decorazione dei caratteri
-
Aggiungere collegamenti ipertestuali
-
Impostare il tipo, la dimensione e il colore del carattere
-
Aggiungere collegamenti ipertestuali
-
Impostare il tipo, la dimensione e il colore del carattere
-
Applicare stili di decorazione dei caratteri
-
Aggiungere collegamenti ipertestuali
-
allineare testo
-
stile di caratteri
-
Impostare il tipo, la dimensione e il colore del carattere
-
Applicare stili di decorazione dei caratteri
-
Impostare il tipo, la dimensione e il colore del carattere
-
Applicare stili di decorazione dei caratteri
-
Impostare il tipo, la dimensione e il colore del carattere
-
Impostare il tipo, la dimensione e il colore del carattere
-
Applicare stili di decorazione dei caratteri
-
Impostare il tipo, la dimensione e il colore del carattere
-
Applicare stili di decorazione dei caratteri
-
Impostare il tipo, la dimensione e il colore del carattere
-
Impostare il tipo, la dimensione e il colore del carattere
-
Applicare stili di decorazione dei caratteri
-
Impostare il tipo, la dimensione e il colore del carattere
-
Applicare stili di decorazione dei caratteri
-
Impostare il tipo, la dimensione e il colore del carattere
-
Impostare il tipo, la dimensione e il colore del carattere
-
Applicare stili di decorazione dei caratteri
-
rientro del testo
-
interlinea
To make your text more emphatic and draw attention to a specific part of the document, you can insert a text box (a rectangular frame that allows to enter text within it) or a Text Art object (a text box with a predefined font style and color that allows to apply some text effects).
Add a text object
You can add a text object anywhere on the page. To do that:
- switch to the Insert tab of the top toolbar,
- select the necessary text object type:
- click outside of the text object to apply the changes and return to the document.
The text within the text object is a part of the latter (when you move or rotate the text object, the text moves or rotates with it).
As an inserted text object represents a rectangular frame with text in it (Text Art objects have invisible text box borders by default) and this frame is a common autoshape, you can change both the shape and text properties.
To delete the added text object, click on the text box border and press the Delete key on the keyboard. The text within the text box will also be deleted.
Format a text box
Select the text box clicking on its border to be able to change its properties. When the text box is selected, its borders are displayed as solid (not dashed) lines.
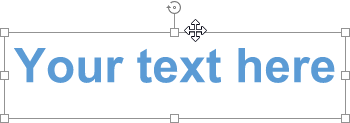
- to resize, move, rotate the text box use the special handles on the edges of the shape.
- to edit the text box fill, stroke, wrapping style or replace the rectangular box with a different shape, click the Shape settings icon on the right sidebar and use the corresponding options.
- to align the text box on the page, arrange text boxes as related to other objects, rotate or flip a text box, change a wrapping style or access the shape advanced settings, right-click on the text box border and use the contextual menu options. To learn more on how to arrange and align objects you can refer to this page.
Format the text within the text box
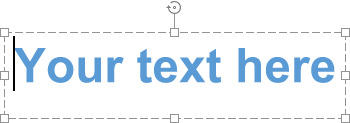
Click the text within the text box to be able to change its properties. When the text is selected, the text box borders are displayed as dashed lines.
Note: it's also possible to change text formatting when the text box (not the text itself) is selected. In such a case, any changes will be applied to all the text within the text box. Some font formatting options (font type, size, color and decoration styles) can be applied to a previously selected portion of the text separately.
To rotate the text within the text box, right-click the text, select the Text Direction option and then choose one of the available options: Horizontal (is selected by default), Rotate Text Down (sets a vertical direction, from top to bottom) or Rotate Text Up (sets a vertical direction, from bottom to top).
To align the text vertically within the text box, right-click the text, select the Vertical Alignment option and then choose one of the available options: Align Top, Align Center or Align Bottom.
Other formatting options that you can apply are the same as the ones for regular text. Please refer to the corresponding help sections to learn more about the necessary operation. You can:
You can also click the Text Art settings icon on the right sidebar and change some style parameters.
Edit a Text Art style
Select a text object and click the Text Art settings icon on the right sidebar.
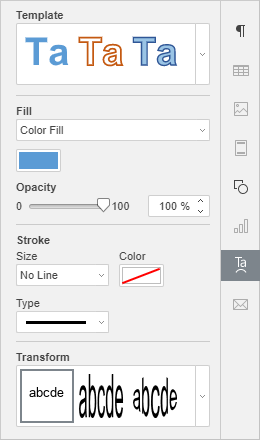
Change the applied text style selecting a new Template from the gallery. You can also change the basic style additionally by selecting a different font type, size etc.
Change the font Fill. You can choose the following options:
-
Color Fill - select this option to specify the solid color you want to fill the inner space of letters with.
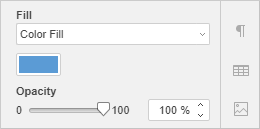
Click the colored box below and select the necessary color from the available color sets or specify any color you like:
-
Gradient Fill - select this option to fill the letters with two colors which smoothly change from one to another.
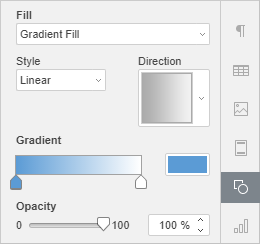
- Style - choose one of the available options: Linear (colors change in a straight line i.e. along a horizontal/vertical axis or diagonally at a 45 degree angle) or Radial (colors change in a circular path from the center to the edges).
- Direction - choose a template from the menu. If the Linear gradient is selected, the following directions are available: top-left to bottom-right, top to bottom, top-right to bottom-left, right to left, bottom-right to top-left, bottom to top, bottom-left to top-right, left to right. If the Radial gradient is selected, only one template is available.
- Gradient - click on the left slider under the gradient bar to activate the color box which corresponds to the first color. Click on the color box on the right to choose the first color in the palette. Drag the slider to set the gradient stop i.e. the point where one color changes into another. Use the right slider under the gradient bar to specify the second color and set the gradient stop.
Note: if one of these two options is selected, you can also set an Opacity level dragging the slider or entering the percent value manually. The default value is 100%. It corresponds to the full opacity. The 0% value corresponds to the full transparency.
- No Fill - select this option if you don't want to use any fill.
Adjust the font Stroke width, color and type.
- To change the stroke width, select one of the available options from the Size dropdown list. The available options are: 0.5 pt, 1 pt, 1.5 pt, 2.25 pt, 3 pt, 4.5 pt, 6 pt. Alternatively, select the No Line option if you don't want to use any stroke.
- To change the stroke color, click on the colored box below and select the necessary color.
- To change the stroke type, select the necessary option from the corresponding dropdown list (a solid line is applied by default, you can change it to one of the available dashed lines).
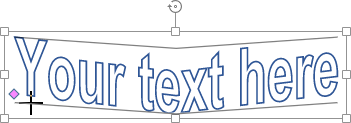
Apply a text effect by selecting the necessary text transformation type from the Transform gallery. You can adjust the degree of the text distortion by dragging the pink diamond-shaped handle.
Alla pagina precedente