Introducing the user interface of the Presentation Editor
The Presentation Editor uses a tabbed interface where editing commands are grouped into tabs according to their functionality.
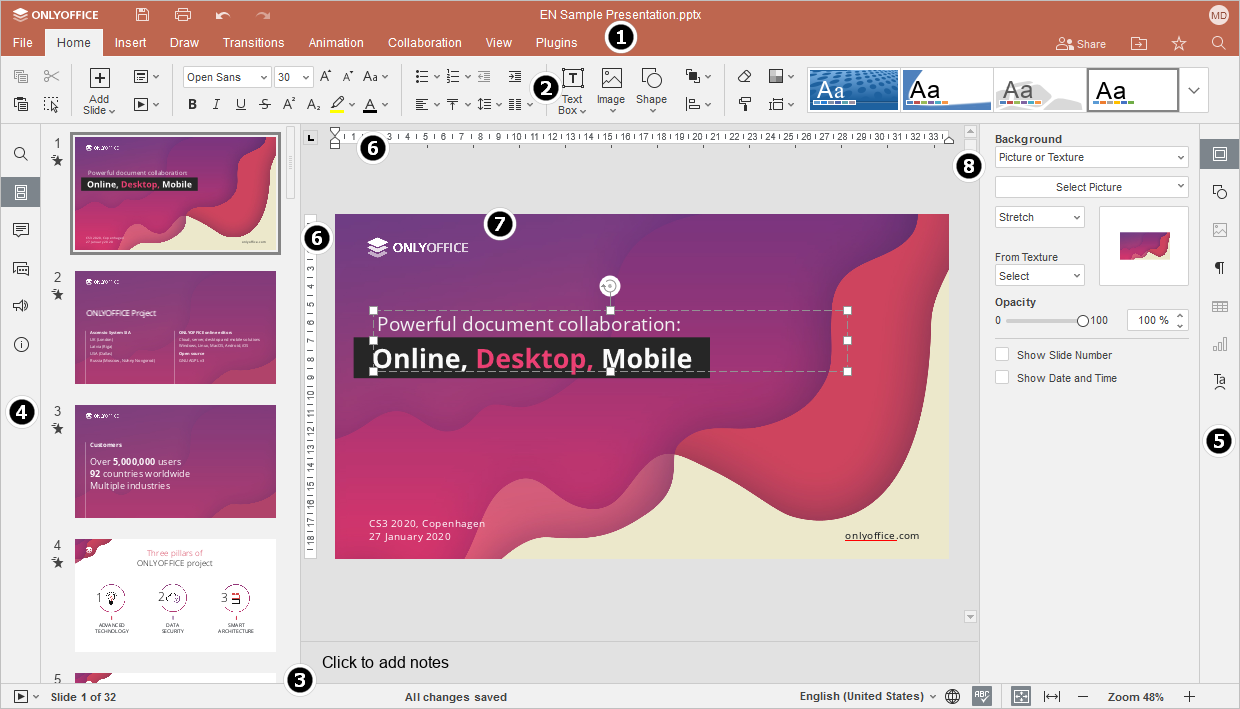
Main window of the Online Presentation Editor:
Main window of the Desktop Presentation Editor:
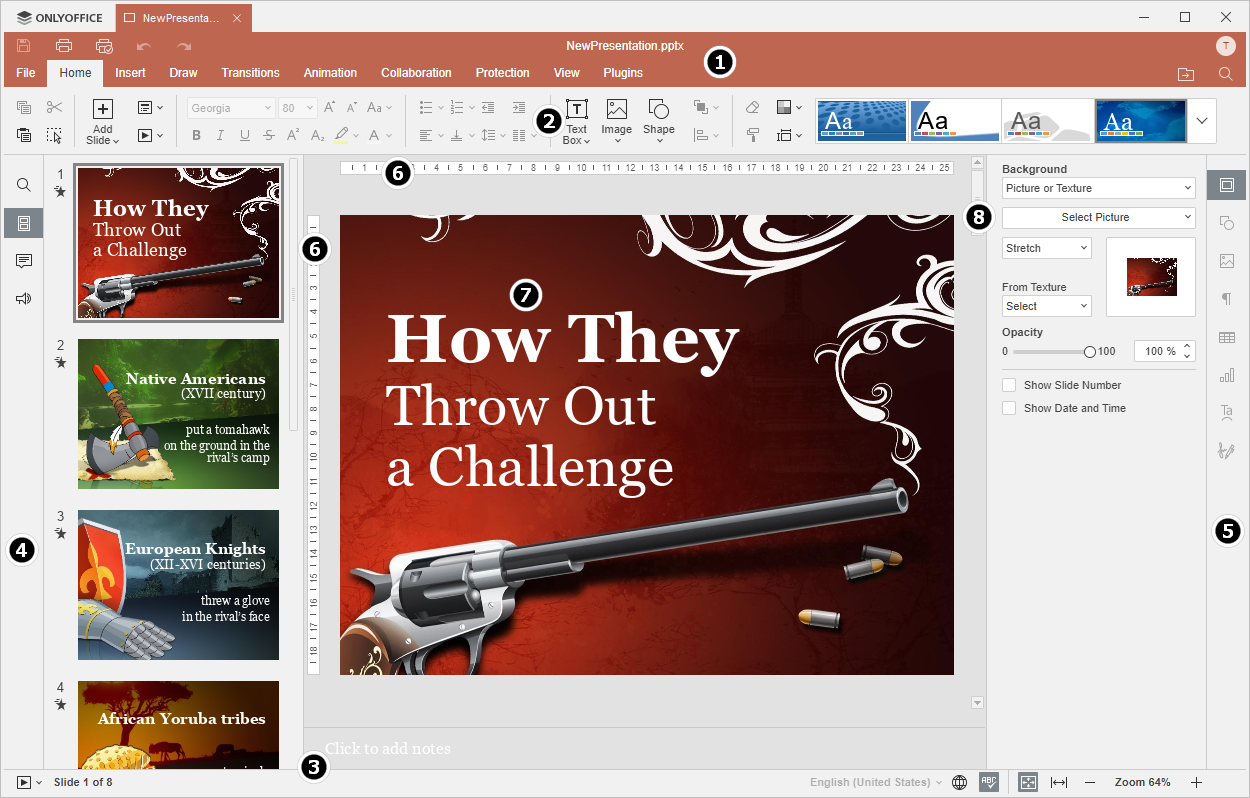
The editor interface consists of the following main elements:
-
The Editor header displays the logo, tabs for all opened presentations with their names and menu tabs.
On the left side of the Editor header, the Save, Print file, Undo and Redo buttons are located.
On the right side of the Editor header, along with the user name the following icons are displayed:
- Open file location - in the desktop version, it allows opening the folder, where the file is stored, in the File Explorer window. In the online version, it allows opening the folder of the Documents module, where the file is stored, in a new browser tab.
- Share - (available in the online version only) allows setting access rights for the documents stored in the cloud.
- Mark as favorite - click the star to add a file to favorites as to make it easy to find. The added file is just a shortcut so the file itself remains stored in its original location. Deleting a file from favorites does not remove the file from its original location.
- Search - allows to search the presentation for a particular word or symbol, etc.
-
The Top toolbar displays a set of editing commands depending on the selected menu tab. Currently, the following tabs are available: File, Home, Insert, Transitions, Animation, Collaboration, Protection, Plugins.
The Copy, Paste, Cut and Select All options are always available on the left side of the Top toolbar regardless of the selected tab.
- The Status bar at the bottom of the editor window contains the Start slideshow icon, some navigation tools: slide number indicator and zoom buttons. The Status bar also displays some notifications (such as "All changes saved", ‘Connection is lost’ when there is no connection and the editor is trying to reconnect etc.) and allows setting the text language and enable spell checking.
-
The Left sidebar contains the following icons:
- - allows using the Search and Replace tool,
- - allows viewing slides and navigating them,
- - allows opening the Comments panel,
- - (available in the online version only) allows opening the Chat panel,
- - (available in the online version only) allows contacting our support team,
- - (available in the online version only) allows viewing the information about the program.
- The Right sidebar allows adjusting additional parameters of different objects. When you select a particular object on a slide, the corresponding icon is activated on the right sidebar. Click this icon to expand the right sidebar.
- The horizontal and vertical Rulers help you place objects on a slide and allow you to set up tab stops and paragraph indents within the text boxes.
- The Working area allows viewing the presentation content, entering and editing data.
- The Scroll bar on the right allows scrolling the presentation up and down.
For your convenience, you can hide some components and display them again when necessary. To learn more on how to adjust the view settings, please refer to this page.
When there are many icons on the left and right panels, the ones below will be hidden, and they can be accessed via the More button.
Return to previous page